Introduction
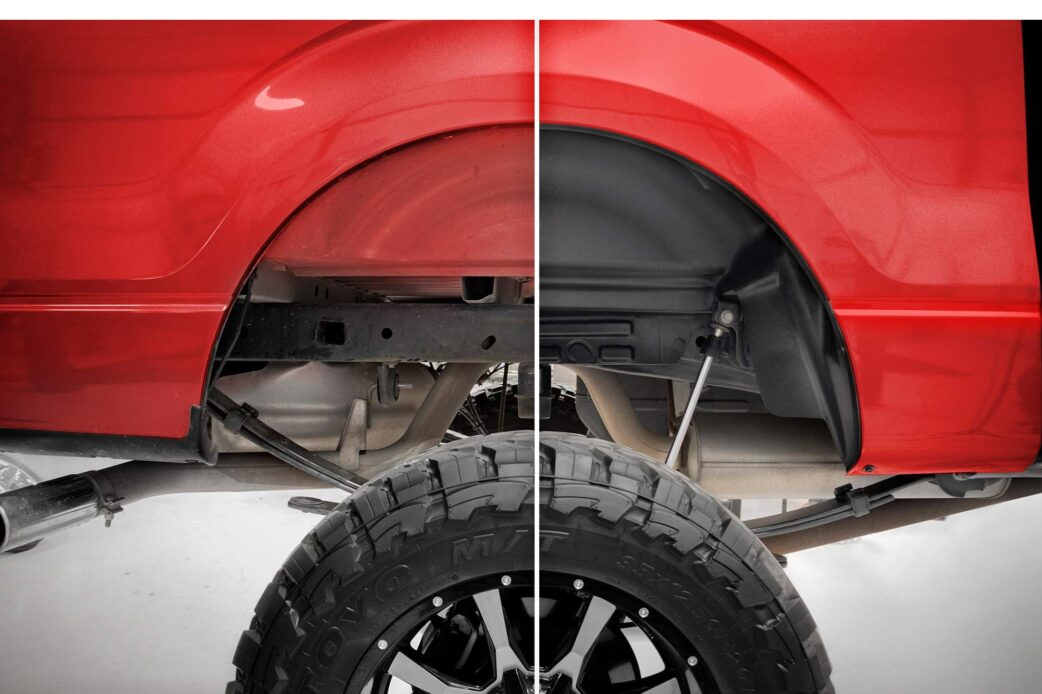
Modifying wheel well/fender liners is an essential step when rolling fenders to accommodate wider tires or lower offsets. Rolled fenders not only enhance the appearance of your vehicle but also improve its performance. By creating more space in the wheel well, you can avoid scraping or rubbing against the tires and achieve a flush fit between the wheels and the fenders. In this article, we will guide you through the process of modifying the wheel well/fender liners to achieve those rolled fenders.
Step 1: Assess the Fender Clearance
Before proceeding with any modification, it is important to determine your specific clearance requirements. This can be done by putting the vehicle on a lift or jack stands and removing the wheels. Examine the space between the fender and the tire, taking note of any potential areas of rubbing or interference.
Step 2: Removing the Wheel Well/Fender Liner
To access the wheel well/fender liner, you will need to remove the wheels from your vehicle. Depending on your vehicle’s make and model, the liner may be attached with clips, screws, or rivets. Carefully remove these fasteners, ensuring that you don’t damage the liner in the process. Once the fasteners are removed, gently pull the liner away from the fender to expose the inner surface.
Step 3: Marking the Fender Liner
Using a marker or pencil, mark the areas on the fender liner that require modification. These marks should correspond to the areas where clearance is needed to accommodate the rolled fenders. It is recommended to mark slightly more than what is necessary to ensure ample clearance.
Step 4: Cutting the Fender Liner
Now it’s time to make the necessary modifications to the fender liner. Start by using a sharp utility knife or a pair of shears to carefully cut along the marked lines. Take your time to ensure clean and precise cuts. If using a utility knife, make multiple shallow passes, rather than trying to cut through in a single stroke. This technique reduces the risk of slipping or damaging the liner.
Step 5: Test Fit and Refine
After making the initial cuts, reattach the wheels and lower the vehicle. Take it for a test drive, paying attention to any scraping or rubbing noises. If there is still interference between the fender and the tire, remove the wheels again and make any necessary refinements to the cuts. This might involve making additional cuts or enlarging the existing ones. Remember, it’s better to trim a little at a time to avoid over-cutting.
Step 6: Smoothing the Cut Edges
Once you are satisfied with the clearance and fit between the fenders and the tires, it’s time to smooth out the cut edges of the fender liner. Use a file or sandpaper to remove any rough or sharp edges. This step is important to prevent the fender liner from causing potential tire damage or injury.
Step 7: Reinstalling the Fender Liner
With the modifications completed, reattach the fender liner to its original position using the OEM fasteners or suitable replacements. Ensure that the liner is securely fastened, as loose liners can create annoying rattling noises while driving.
Step 8: Final Test Drive and Adjustment
Take the vehicle for another test drive to confirm that the modified fender liners are working as intended. Listen for any abnormal noises or signs of rubbing. If everything seems in order, congratulations! You have successfully modified your fender liners to accommodate your rolled fenders.
What’s a normal price for fender rolling?
The cost of fender rolling can vary depending on several factors, including the location, the type of vehicle, and the extent of the work required. On average, you can expect to pay anywhere between $100 to $300 for professional fender rolling services. However, keep in mind that prices may vary, so it’s best to contact local automotive shops or body shops to get an accurate quote for the specific work you need.
Related posts:
Why aren’t there any rear wheelwell liners?
Best way to modify inner fender well
There are several ways to modify inner fender wells, depending on what specific modifications you have in mind. Here are a few common methods:
If you want to modify the inner fender well, here are some steps you can follow:
- Remove the wheel: Start by removing the wheel from the vehicle. This will give you better access to the inner fender well.
- Clean the inner fender well: Before making any modifications, clean the inner fender well thoroughly. Remove any dirt, debris, or rust using a brush, rag, or a pressure washer. This will ensure a clean surface for the modifications.
- Mark the areas for modification: Use a marker or chalk to mark the areas where you want to make modifications. This can include cutting out sections for better airflow, enlarging the existing openings, or creating new openings for specific purposes like running wires or pipes.
- Drill holes or use a cutting tool: Depending on the modification you want to make, you will either need to drill holes or use a cutting tool like a reciprocating saw or a Dremel tool. Ensure you have the appropriate safety gear such as gloves, goggles, and a mask to protect yourself from debris and dust.
- Make the modifications: Carefully drill the holes or cut along the marked lines to make the desired modifications. Take your time and be cautious to avoid any damage to the fender
How to modify wheel well/fender liner for rolled fenders? – Conclusion.
Modifying wheel well/fender liners is an integral step in achieving rolled fenders. By following the steps outlined above, you will be able to create the necessary clearance for your wider tires or lower offsets. Remember to proceed cautiously and make incremental modifications to ensure a proper fit. By taking your time and employing the right techniques, you can achieve a flush fit between your wheels and your fenders, enhancing both the appearance and performance of your vehicle.


